
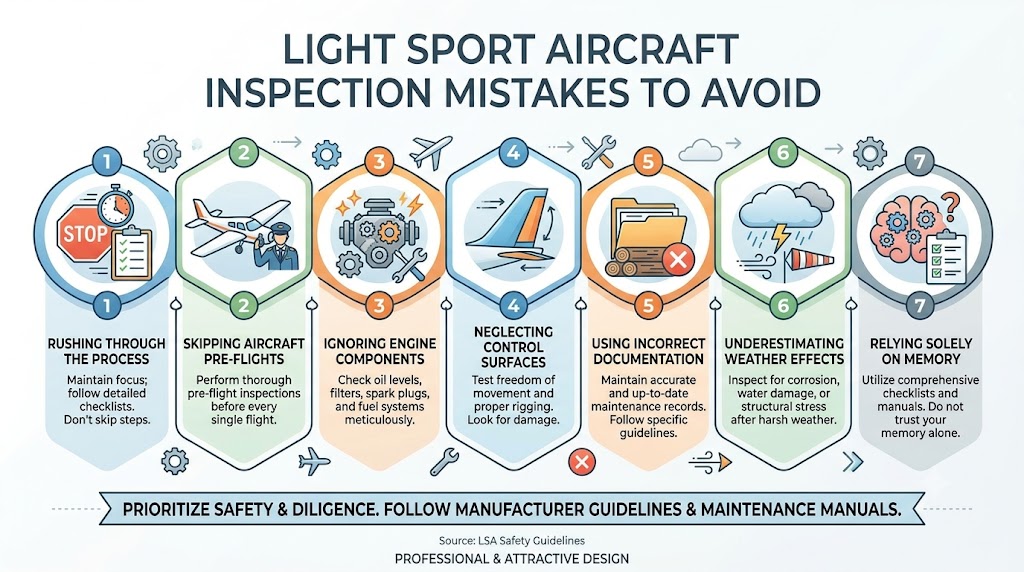
Introduction
Inspecting a Light Sport Aircraft (LSA) requires more than walking around the aircraft, checking for visible damage, and confirming that the engine starts. A proper inspection is an airworthiness and risk-management exercise that combines physical condition, maintenance history, configuration, operating limitations, inspection requirements, and manufacturer guidance.
One of the most common mistakes is assuming that a smaller or simpler aircraft automatically requires a simpler inspection. In practice, lightweight airframes can contain systems and construction methods that demand careful attention, including composite structures, fabric components, Rotax or other specialized powerplants, retractable or nonstandard landing gear, ballistic recovery systems, electronic flight displays, and aircraft-specific control systems.
The inspection process also depends heavily on how the aircraft is certificated. Special Light-Sport Aircraft, Experimental Light-Sport Aircraft, and aircraft operating under other certification arrangements can have different maintenance and inspection requirements. FAA guidance emphasizes the importance of applicable manufacturer procedures and appropriate qualifications for people performing maintenance or condition inspections.
The goal should not simply be to find defects. A good inspection should establish whether the aircraft’s condition, records, configuration, and maintenance history provide sufficient evidence that it is appropriate for continued operation or purchase.
1. Treating Every Light Sport Aircraft as the Same
This is one of the first mistakes to avoid.
“Light Sport Aircraft” describes a regulatory category, but aircraft within that broad category can differ substantially in:
- Construction
- Propulsion
- Avionics
- Landing gear
- Flight controls
- Fuel systems
- Electrical architecture
- Inspection requirements
- Maintenance documentation
- Operating limitations
- Certification basis
A metal high-wing aircraft should not be inspected using exactly the same approach as a composite low-wing aircraft. Likewise, an aircraft with conventional mechanical instruments requires different attention from one heavily dependent on integrated electronic displays.
Better approach
Start by identifying:
- Aircraft make and model
- Serial number
- Certification category
- Airworthiness certificate
- Applicable operating limitations
- Aircraft-specific maintenance documentation
- Engine and propeller installations
- Major modifications
- Current inspection status
The inspection checklist should then be adapted to that aircraft.
2. Focusing on the Exterior and Ignoring the Records
A clean aircraft can have poor maintenance history.
This is particularly important when evaluating a used LSA. Physical condition tells only part of the story. Maintenance records can reveal:
- Repeated component failures
- Deferred maintenance
- Recurring discrepancies
- Major repairs
- Structural repairs
- Propeller changes
- Engine work
- Avionics modifications
- Accident or incident history
- Inspection findings
- Compliance with applicable directives
- Changes to the aircraft’s configuration
An aircraft that looks excellent but has incomplete or contradictory records deserves additional scrutiny.
What to compare
The aircraft itself should be compared against its records.
Check whether:
- The installed engine matches the documentation.
- The propeller installation is documented.
- Major avionics installations are recorded.
- Repairs and alterations have appropriate documentation.
- Aircraft hours are internally consistent.
- Engine and propeller time make sense.
- Inspection entries correspond with the aircraft’s actual configuration.
Records are not paperwork separate from the aircraft. They are part of the aircraft’s continuing-airworthiness story.
3. Assuming a Current Inspection Means the Aircraft Is Problem-Free
A current inspection is important, but it should not be treated as a guarantee that every potential problem has been eliminated.
An inspection determines the aircraft’s condition according to the applicable inspection scope and requirements. It does not remove the need for sensible ongoing maintenance or eliminate every possibility of hidden deterioration.
FAA guidance notes that condition inspections for applicable aircraft must meet the required inspection scope, and manufacturer inspection programs can provide aircraft-specific coverage beyond generic inspection items.
Better approach
Ask:
- What inspection was performed?
- Who performed it?
- What inspection program was used?
- Were discrepancies identified?
- Which discrepancies were corrected?
- Were any items monitored rather than repaired?
- Were manufacturer procedures consulted?
- Were significant repairs or alterations reviewed?
The objective is to understand the quality and scope of the inspection, not simply its date.
4. Ignoring Manufacturer Inspection Procedures
A generic checklist can be useful, but it should not replace aircraft-specific maintenance information.
Manufacturer documentation may contain inspection requirements for:
- Structural attachment points
- Control systems
- Composite components
- Landing gear
- Fuel tanks
- Engine installations
- Propeller systems
- Fasteners
- Inspection intervals
- Special tools
- Lubrication points
- Known problem areas
FAA guidance encourages use of manufacturer-recommended inspection programs when available because they can address aircraft-specific features that generic inspection requirements may not fully capture.
Common mistake
An inspector checks every item on a familiar generic checklist but never asks:
“What does this particular aircraft manufacturer require me to inspect?”
That approach can create false confidence.
5. Overlooking Structural Damage
Structural inspection is one of the most important parts of an LSA evaluation.
Depending on the aircraft, attention may be required around:
- Wing attach points
- Fuselage frames
- Spars
- Landing gear attachments
- Control-surface hinges
- Engine mounts
- Firewall areas
- Composite joints
- Fabric surfaces
- Tubular structures
- Fastener locations
- Previous repair areas
Surface appearance alone may not reveal every structural problem.
Composite aircraft deserve particular attention
Composite structures can present inspection challenges because damage may not always be obvious from a casual visual inspection.
Potential warning signs include:
- Unusual surface deformation
- Cracks
- Discoloration
- Evidence of impact
- Localized repairs
- Delamination indicators
- Previous hard-landing evidence
- Unusual changes around attachment points
Inspection methods should follow applicable manufacturer or qualified maintenance guidance rather than relying on assumptions.
6. Checking for Corrosion Too Late
Corrosion is often treated as an obvious exterior problem, but important corrosion can exist in less visible locations.
Inspect areas such as:
- Interior structural members
- Fastener locations
- Landing gear components
- Engine compartment
- Battery compartment
- Drain areas
- Control-system components
- Hardware exposed to moisture
- Areas where dissimilar metals meet
Aircraft stored in humid environments or operated around saltwater may require especially careful corrosion assessment.
Practical lesson
Do not ask only:
“Does the aircraft have corrosion?”
Ask:
“Where could moisture realistically accumulate on this aircraft?”
That question produces a much more useful inspection.
7. Inspecting the Engine Without Looking at Its Installation
An engine can run smoothly during a short ground test and still require further investigation.
An inspection should consider the complete installation, including:
- Engine mounts
- Mount hardware
- Hoses
- Fuel connections
- Oil system
- Cooling system
- Exhaust system
- Electrical connections
- Sensors
- Wiring
- Propeller interface
- Firewall penetrations
- Evidence of leaks
- Evidence of overheating
- Abnormal vibration
The installation environment matters as much as the engine itself.
Do not rely only on startup performance
A successful engine start demonstrates that the engine can start.
It does not by itself establish:
- Overall engine condition
- Remaining component life
- Maintenance quality
- Absence of leaks
- Correct installation
- Propeller condition
- Cooling-system integrity
Engine-specific inspection procedures should be followed.
8. Neglecting the Propeller
Propeller inspection is sometimes overshadowed by engine inspection.
That is a mistake.
Depending on the installation, inspect for:
- Nicks
- Cracks
- Corrosion
- Surface damage
- Improper repairs
- Hub condition
- Fastener condition
- Tracking issues
- Unusual vibration
- Documentation discrepancies
Propeller history should also be reviewed.
Questions worth asking include:
- When was it installed?
- Has it been repaired?
- Has it experienced a significant impact?
- What inspection requirements apply?
- Does the documentation correspond to the installed propeller?
A propeller is a critical rotating component and should not be treated as a cosmetic item.
9. Missing Control-System Problems
Flight-control systems deserve careful inspection because small problems can have significant operational consequences.
Look at:
- Control cables
- Pushrods
- Bellcranks
- Hinges
- Pulleys
- Rod ends
- Safetying
- Attachment hardware
- Control stops
- Free movement
- Control-surface alignment
- Evidence of interference
The controls should move correctly through their intended range without unusual resistance, binding, excessive play, or interference.
Common mistake
Checking that the control surfaces move is not the same as inspecting the control system.
The inspection should consider both movement and the condition of the components producing that movement.
10. Ignoring Landing Gear and Wheel Assemblies
Landing gear experiences repeated loads and deserves more attention than a quick visual check.
Inspect:
- Gear legs
- Attachment points
- Wheel bearings
- Brakes
- Brake lines
- Tires
- Axles
- Hardware
- Fairings
- Steering mechanisms
- Evidence of uneven wear
- Evidence of hard landings
Look for clues that may indicate previous abnormal loading.
For example, unusual tire wear combined with wheel alignment issues may deserve investigation rather than simply replacing the tire.
11. Treating Tires and Brakes as Minor Items
Consumable components are easy to overlook because they are inexpensive compared with major aircraft components.
That does not make them unimportant.
Check:
- Tire condition
- Age and serviceability according to applicable guidance
- Tread and sidewalls
- Wheel condition
- Brake wear
- Brake-fluid condition where applicable
- Hydraulic lines
- Leaks
- Parking-brake operation where installed
Small maintenance deficiencies can become operational problems if they accumulate.
12. Overlooking Fuel-System Problems
Fuel-system inspection should include more than checking fuel quantity.
Consider:
- Fuel lines
- Fittings
- Clamps
- Tanks
- Vents
- Drains
- Filters
- Pumps
- Fuel selectors
- Connections
- Evidence of leakage
- Fuel-system modifications
- Correct fuel requirements
Pay particular attention to routing.
Fuel lines should not be exposed to unnecessary:
- Heat
- Chafing
- Vibration
- Abrasion
- Sharp edges
- Improper support
Fuel-system modifications should be traceable to appropriate technical documentation.
13. Ignoring Electrical Wiring Quality
Modern LSAs can contain surprisingly sophisticated electrical systems.
Inspect:
- Battery installation
- Battery connections
- Circuit protection
- Wiring support
- Ground connections
- Connectors
- Chafing protection
- Routing
- Firewall penetrations
- Avionics wiring
- Switches
- Electrical loads
A beautifully installed avionics display does not automatically mean the underlying wiring is professionally installed.
Warning signs
Pay attention to:
- Loose wiring
- Unsecured harnesses
- Improvised splices
- Unidentified modifications
- Poor strain relief
- Excessive wire movement
- Heat-damaged insulation
- Unprotected penetrations
Electrical workmanship is an important indicator of overall maintenance quality.
14. Assuming Avionics Are Fully Functional Because the Screens Turn On
Electronic displays can power up while individual functions remain defective.
Test applicable systems rather than merely confirming that the screens illuminate.
Depending on the aircraft, this may include:
- Flight displays
- Engine monitoring
- GPS/navigation equipment
- Communication radios
- Transponder
- ADS-B equipment
- Audio panel
- Intercom
- Backup instruments
- Warning systems
- Sensors
Also check whether installed equipment is properly documented.
An avionics upgrade without adequate documentation should trigger additional questions.
15. Forgetting Backup Instruments and Failure Modes
Modern aircraft often rely heavily on electronic systems.
The inspection should therefore consider:
What happens if the primary electronic system fails?
Look for:
- Backup instruments
- Independent power sources
- Battery backup
- Appropriate circuit protection
- Emergency procedures
- System redundancy where applicable
The purpose is not to make every LSA excessively complex. It is to understand the aircraft’s actual failure modes.
16. Ignoring the Battery and Charging System
Battery condition is often underestimated.
Inspect:
- Battery installation
- Terminals
- Mounting
- Venting where applicable
- Corrosion
- Charging performance
- Electrical connections
- Alternator or generator system
- Related circuit protection
A weak battery can expose other electrical-system problems that may not be obvious during normal operation.
17. Failing to Investigate Previous Repairs
A repair itself is not necessarily a problem.
An undocumented, poorly executed, or inappropriate repair is a different matter.
Previous repairs should be evaluated for:
- What happened?
- What component was damaged?
- How was it repaired?
- Who performed the work?
- What data or procedure supported the repair?
- Was the repair documented?
- Does the current aircraft configuration match the records?
The objective is not to reject an aircraft simply because it has repair history.
The objective is to understand the quality and implications of that history.
18. Overlooking Modifications and Alterations
Modified aircraft require additional scrutiny.
Examples include:
- Avionics upgrades
- Engine changes
- Propeller changes
- Lighting modifications
- Electrical modifications
- Interior changes
- Structural changes
- Wheel and brake changes
- Instrument-panel redesigns
- Additional equipment
The question should always be:
“Is this configuration properly supported by the applicable aircraft documentation and approval or authorization requirements?”
This becomes especially important because certification category and applicable rules affect how repairs and alterations are handled. FAA guidance distinguishes maintenance and alteration requirements across different LSA and experimental configurations.
19. Confusing Safety Directives With Airworthiness Directives
This is an area where terminology and regulatory treatment matter.
Applicable Airworthiness Directives can impose mandatory requirements. FAA guidance also discusses manufacturer-issued safety directives and the different treatment that can apply depending on aircraft certification status.
Therefore, an inspection should not simply ask:
“Are all manufacturer service bulletins completed?”
Instead, determine:
- Which directives apply?
- Which are mandatory?
- Which are recommended?
- What aircraft certification category applies?
- What does the applicable operating limitation or maintenance framework require?
- Has a safety-related condition been identified?
This distinction should be confirmed against the current regulatory and aircraft-specific documentation.
20. Assuming the Inspection Rules Are Identical for Every LSA
This is a particularly important mistake.
LSA maintenance and inspection requirements can depend on the aircraft’s certification and configuration.
For example, FAA materials distinguish special light-sport aircraft from experimental light-sport aircraft and describe different repairman privileges and inspection responsibilities.
Before inspecting, establish the aircraft’s status
| Inspection Question | Why It Matters |
|---|---|
| What certification category does the aircraft have? | Determines applicable requirements |
| What airworthiness certificate does it hold? | Establishes the regulatory framework |
| What operating limitations apply? | May contain important maintenance provisions |
| What inspection program applies? | Defines required inspection scope |
| Who performed previous inspections? | Helps establish qualification and record quality |
| What manufacturer documentation applies? | Provides aircraft-specific procedures |
| What modifications exist? | May change inspection requirements |
Do not apply a familiar checklist simply because the aircraft looks familiar.
21. Failing to Verify the Inspector’s Qualifications
A technically capable person is not automatically authorized to perform every inspection or approve every maintenance task.
The qualifications and privileges required depend on the work and aircraft.
FAA guidance explains that light-sport repairman certificates have specific privileges and limitations, including distinctions between inspection and maintenance ratings.
Before relying on an inspection, establish:
- Who performed it?
- What certificate or authorization did they hold?
- What privileges applied?
- Was the aircraft within the scope of those privileges?
- Was the appropriate inspection program used?
For unfamiliar aircraft systems, FAA guidance also emphasizes the importance of competence with the specific task and appropriate training or supervision.
22. Relying on a Short Test Flight as the Final Inspection
A test flight can provide valuable information, but it should be one component of the overall evaluation.
A flight may reveal:
- Vibration
- Trim problems
- Instrument discrepancies
- Cooling issues
- Engine behavior
- Control anomalies
- Electrical problems
- Radio problems
But flight testing should be conducted only within appropriate operational, regulatory, and safety boundaries.
A test flight should never be used to compensate for inadequate maintenance-record review or an incomplete physical inspection.
23. Not Comparing the Aircraft With Its Documentation
This is one of the highest-value inspection habits.
The aircraft and paperwork should tell the same story.
Compare:
Physical aircraft → maintenance records → inspection program → operating limitations → installed equipment
Look for inconsistencies such as:
- Different engine configuration
- Different propeller
- Unrecorded avionics
- Missing equipment
- Changed instrumentation
- Structural repairs
- Unexplained weight or configuration changes
A discrepancy does not automatically mean the aircraft is unsafe, but it does mean the discrepancy needs explanation.
24. Ignoring Evidence of Poor Workmanship
Aircraft inspection is partly a technical assessment and partly an assessment of maintenance quality.
Look for:
- Loose hardware
- Improper routing
- Missing safetying
- Chafing
- Poorly supported wiring
- Unsecured hoses
- Inconsistent fasteners
- Improvised repairs
- Unfinished modifications
- Leaks
- Contamination
- Evidence of repeated temporary fixes
One poor installation does not prove that the entire aircraft is poorly maintained.
Several unrelated examples can, however, justify a deeper inspection.
25. Inspecting Only What Is Easy to See
A common inspection failure is “access bias.”
Inspectors naturally spend more time on components that are easy to reach.
Important components may be hidden behind:
- Fairings
- Interior panels
- Inspection covers
- Engine cowling
- Instrument panels
- Wheel pants
- Access panels
Where inspection procedures require access, do not assume that a component is satisfactory simply because it was not convenient to inspect.
The inspection scope should determine the required level of access.
26. Ignoring Environmental History
An aircraft’s operating and storage environment can influence its condition.
Ask about:
- Indoor versus outdoor storage
- Coastal operation
- Humidity
- Long periods of inactivity
- Frequent short flights
- Dust exposure
- Harsh operating environments
- Significant weather exposure
An aircraft with low flight time is not automatically in better condition.
Long periods of inactivity can create their own maintenance concerns.
27. Treating Low Hours as Proof of Low Risk
Aircraft time is useful information, but it is only one variable.
A low-time aircraft can still have:
- Aging components
- Deteriorated seals
- Corrosion
- Poor storage history
- Outdated equipment
- Deferred maintenance
- Incomplete records
- Previous damage
Conversely, an aircraft with more operating time may have an extensive and well-documented maintenance history.
The better question is:
“What does the combination of time, age, usage, storage, inspection history, and maintenance quality tell us?”
28. Not Investigating Repeated Discrepancies
Repeated defects deserve attention.
Suppose records repeatedly mention:
- Electrical faults
- Brake problems
- Cooling issues
- Control-system adjustments
- Instrument failures
- Fuel leaks
The right response is not simply to count the repairs.
Ask whether the underlying cause was actually resolved.
Recurring discrepancies can indicate:
- Root-cause problems
- Installation issues
- Incorrect parts
- Maintenance practices
- Environmental effects
- Design-specific weaknesses
29. Treating a Pre-Purchase Inspection Like a Routine Annual Inspection
These inspections have different objectives.
A routine inspection determines whether the aircraft meets the applicable inspection requirements.
A pre-purchase inspection should additionally help the buyer understand:
- Condition
- Maintenance quality
- Upcoming maintenance
- Significant repairs
- Configuration
- Documentation
- Known discrepancies
- Ownership risks
- Likely near-term costs
The scope should therefore be agreed before the inspection begins.
A buyer should understand exactly what the inspection includes and what it does not include.
30. Failing to Create a Defect-Severity Framework
Not every finding has the same significance.
A practical inspection report can classify findings into categories such as:
| Finding Type | Typical Response |
|---|---|
| Immediate airworthiness concern | Address before operation |
| Significant mechanical issue | Investigate and correct promptly |
| Documentation discrepancy | Resolve before relying on the record |
| Maintenance deficiency | Correct according to applicable requirements |
| Wear item | Monitor or replace according to condition and guidance |
| Cosmetic issue | Evaluate separately from airworthiness |
| Information gap | Obtain additional documentation |
This prevents minor cosmetic observations from receiving the same attention as safety-critical defects.
31. Not Documenting Findings Properly
A useful inspection report should be understandable to someone who was not present during the inspection.
Record:
- Component
- Location
- Observed condition
- Relevant measurement where applicable
- Supporting photograph where appropriate
- Applicable reference
- Recommended follow-up
- Whether further investigation is required
Avoid vague statements such as:
“Aircraft looks good.”
A professional inspection should communicate evidence, not impressions.
32. Failing to Establish a Clear Inspection Boundary
No inspection can examine every possible condition without limits.
The inspector and owner should understand:
- What was inspected
- What was not inspected
- What components were inaccessible
- What tests were performed
- What tests were not performed
- Whether the engine was operated
- Whether a flight test occurred
- Which documents were reviewed
Clear boundaries reduce misunderstandings.
A Practical LSA Inspection Workflow
A disciplined inspection can be organized into several stages.
Stage 1: Establish Aircraft Identity
Verify:
- Make
- Model
- Serial number
- Registration
- Certification category
- Airworthiness documentation
Stage 2: Review the Documentation
Collect:
- Maintenance records
- Inspection records
- Aircraft manuals
- Engine documentation
- Propeller documentation
- Modification records
- Repair records
- Operating limitations
- Applicable directives and service information
Stage 3: Build an Aircraft-Specific Inspection Plan
Identify:
- Known model-specific issues
- Structural inspection points
- Engine-specific requirements
- Propeller requirements
- Avionics configuration
- Modification areas
- Special inspection requirements
Stage 4: Perform the Physical Inspection
Work systematically through:
- Structure
- Flight controls
- Landing gear
- Engine
- Propeller
- Fuel system
- Electrical system
- Avionics
- Interior
- Emergency equipment where applicable
- Exterior
- Identification and placards
Stage 5: Reconcile Findings With Records
Every significant discrepancy should lead to a question:
“Is this already documented?”
If not, investigate why.
Stage 6: Assess Airworthiness and Maintenance Needs
Separate:
- Safety-critical findings
- Regulatory/documentation findings
- Maintenance findings
- Wear items
- Cosmetic issues
This produces a more useful final assessment.
Stage 7: Document the Results
Create a clear report with:
- Findings
- Evidence
- Severity
- Recommended action
- Open questions
- Documentation gaps
- Follow-up requirements
LSA Inspection Checklist
Use this as a high-level reminder rather than a substitute for the applicable aircraft-specific inspection program.
Documentation
- Aircraft identity verified
- Airworthiness documentation reviewed
- Operating limitations reviewed
- Maintenance records reviewed
- Inspection history reviewed
- Major repairs identified
- Modifications identified
- Applicable directives reviewed
- Manufacturer documentation available
Structure
- Wings inspected
- Fuselage inspected
- Attach points inspected
- Landing gear structure inspected
- Composite areas checked where applicable
- Corrosion assessed
- Previous repairs reviewed
Flight Controls
- Control surfaces inspected
- Hinges checked
- Cables/pushrods checked
- Pulleys checked
- Control-system hardware checked
- Full movement verified
- Abnormal play investigated
Engine
- Engine installation inspected
- Mounts checked
- Hoses checked
- Fuel system checked
- Cooling system checked
- Exhaust system checked
- Electrical connections checked
- Leaks investigated
Propeller
- Blades inspected
- Hub inspected
- Mounting checked
- Damage history reviewed
- Documentation verified
Landing Gear
- Gear structure checked
- Wheels checked
- Tires checked
- Brakes checked
- Bearings checked
- Steering checked where applicable
Electrical and Avionics
- Battery checked
- Charging system checked
- Wiring inspected
- Circuit protection reviewed
- Avionics function checked
- Backup systems considered
- Modifications documented
Final Review
- Findings documented
- Records reconciled
- Open discrepancies identified
- Inspection limitations recorded
- Follow-up actions identified
The Most Important Inspection Questions
When evaluating an LSA, the following questions can uncover issues that a simple walk-around may miss:
- What certification category does this aircraft actually have?
- What inspection program applies to it?
- Are the aircraft’s current configuration and records consistent?
- Who performed the most recent inspection, and were they appropriately qualified?
- What major repairs or alterations have been performed?
- Are manufacturer inspection procedures available and being followed where applicable?
- Are there recurring discrepancies in the maintenance history?
- What components are approaching required or recommended maintenance?
- Are there undocumented modifications?
- Are there unresolved documentation gaps?
- What evidence exists regarding previous damage or hard landings?
- What parts of the aircraft could not be adequately inspected?
These questions help shift an inspection from a simple visual exercise toward a structured airworthiness assessment.
Special Considerations for Buyers
If the inspection is part of an aircraft purchase, avoid selecting an inspector solely because they are nearby or inexpensive.
Relevant considerations include:
- Familiarity with the aircraft type
- Experience with its engine
- Experience with its construction
- Knowledge of its avionics
- Understanding of its certification category
- Ability to interpret maintenance documentation
- Willingness to document findings clearly
The inspector should work for the quality of the evaluation rather than simply confirming what the buyer or seller hopes to hear.
A pre-purchase inspection should also be agreed in writing so that everyone understands its scope.
How to Avoid the Most Expensive Inspection Mistakes
The most costly mistakes are often not individual defective components. They are failures in the inspection process.
A strong process should:
1. Start With Certification Status
Know what regulatory and maintenance framework applies.
2. Read Before Inspecting
Review the records and manufacturer information before beginning the physical inspection.
3. Inspect Systematically
Use an aircraft-specific workflow rather than relying on memory.
4. Investigate Anomalies
Do not dismiss unusual wear, undocumented changes, or recurring defects.
5. Reconcile the Records
Make sure the paperwork and aircraft configuration agree.
6. Separate Findings by Significance
A cosmetic defect should not obscure a structural or control-system concern.
7. Document Everything Material
Good documentation supports better maintenance decisions later.
8. Escalate When Necessary
If a finding requires specialized knowledge, obtain the appropriate qualified expertise rather than guessing.
Why a Good LSA Inspection Is More Than a Checklist
Checklists are valuable because they reduce omissions.
But an experienced inspection requires judgment.
For example, a checklist may say:
Inspect engine mounts.
An experienced inspector also considers:
- Why is there unusual wear?
- Is there vibration?
- Has the engine been replaced?
- Has the mount hardware been disturbed?
- Is there evidence of previous damage?
- Does the maintenance history explain the condition?
That difference—between checking a box and understanding the evidence—is what makes an inspection genuinely useful.
Final Takeaways
The most common Light Sport Aircraft inspection mistakes involve assumptions: assuming all LSAs have identical requirements, assuming a current inspection means everything is satisfactory, assuming a clean exterior means the structure is sound, or assuming complete-looking records tell the entire story.
A strong inspection combines the aircraft’s physical condition, certification status, maintenance history, configuration, manufacturer guidance, and applicable requirements.
The inspection should also recognize the limits of what can be established through a single examination. FAA guidance makes clear that LSA maintenance and inspection privileges depend on the aircraft and the qualifications of the person performing the work.
For buyers, owners, and operators, the safest approach is systematic: establish the aircraft’s regulatory status, review the records, follow the applicable inspection program, investigate discrepancies, document findings, and obtain qualified specialist input when the aircraft or problem is outside the inspector’s experience.
A good inspection does not merely answer whether an aircraft looks acceptable. It creates a defensible understanding of what is known, what needs attention, what remains uncertain, and what should happen next.

